

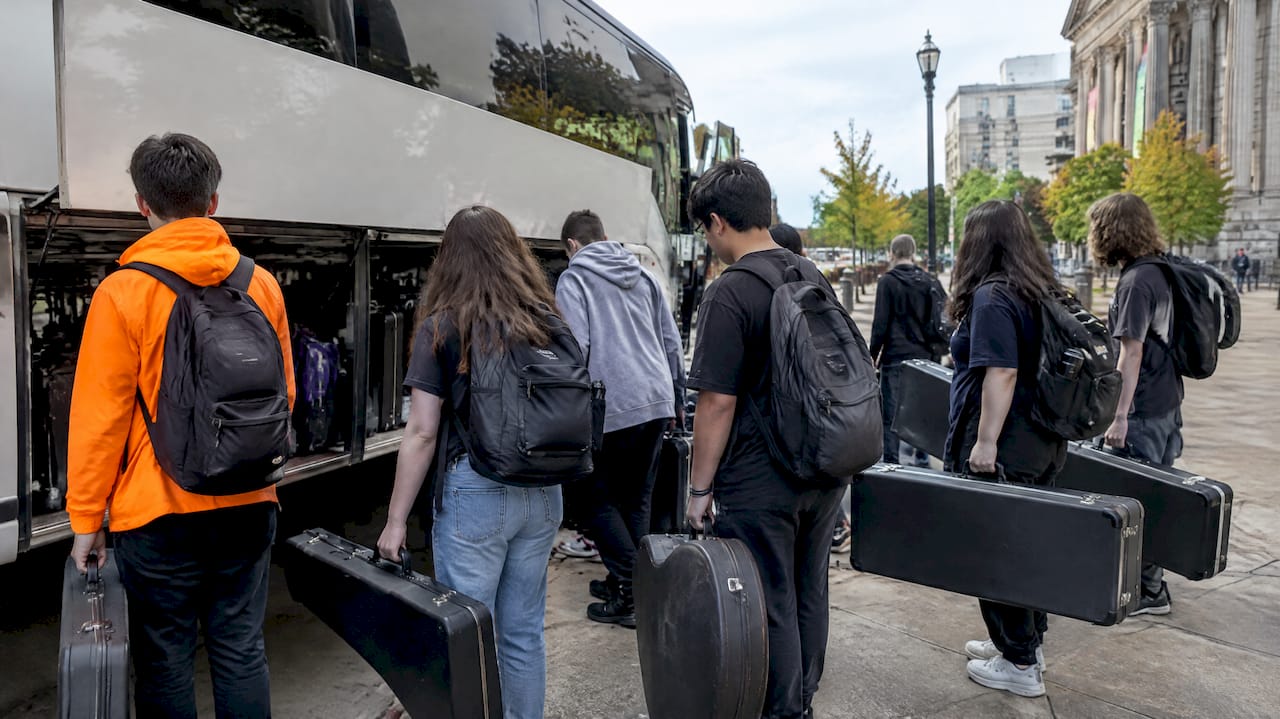
Safely moving student instruments and performance gear depends on one system: a master inventory, a named equipment lead, written run sheets, early carrier confirmation, and the right packing. Add photo documentation of every case and book transport weeks ahead of your travel dates. Performance tours for schools and youth groups are organized every season, and Donovan put this operational playbook together from what actually keeps gear moving without loss or damage.
TL;DR:
- Airlines set their own cabin size and weight limits, so confirm them in writing before booking; large instruments may need checking or an extra seat.
- Reserve ground transport two to three months ahead when possible, because deposits hold dates and dedicated storage buses can fill during festival season.
- Measure large cases against bus compartments before booking; ensembles carrying marimbas, timpani, or color guard gear may need a separate truck or trailer.
- For international tours, an ATA Carnet lasts one year and allows multiple reentries in participating countries, but acceptance and serial number rules vary by destination.
- Confirm the venue’s exact instrument models and accessories before departure, then bring familiar mallets or other key items instead of relying on substitutes.
Table of Contents
- Essential equipment checklist and timeline for bookings
- Assign roles, documentation, and on-site run sheets
- Transport modes and regulatory screening: air travel, charter buses, and local carriers
- Packing, labeling, loading, staging, and venue coordination best practices
- International tour essentials: ATA Carnet and customs documentation
- Contingency planning: backups, spares, and post-performance verification
- Vehicle type and size selection guidance based on equipment volume and fragility
- Detailed loading and securing methods inside transport vehicles to prevent damage
- Special considerations for temperature or humidity-sensitive instruments or gear
- Communication protocols among transport team during transit and at venues
- Donovan’s practical take from organizing school performance trips
- Group Travel Network: how we support equipment transport on performance tours
- FAQ
- Sources
Essential equipment checklist and timeline for bookings
A master inventory is the backbone of equipment transport for any performance tour. Build one spreadsheet or shared document before you book anything, and keep it current through the final load-out.
Your inventory should track, at minimum:
- Case ID and serial number for each instrument or major piece of equipment.
- Condition notes recorded before departure, with photos attached.
- Student or section owner assigned to each case.
- Accessories list (mutes, reeds, mallets, stands, cables) tied to that case ID.
NAfME (opens in a new tab) recommends maintaining electronic instrument inventories, documenting cases and accessories in loan agreements, and assigning an equipment lead, then applying those same controls to a tour rather than treating travel as a separate system.
Booking timelines matter as much as the inventory itself. Reserve charter coaches and local vans as soon as your itinerary is set, well in advance, since dedicated storage buses book up quickly during busy festival seasons. Airline reservations for instruments need even earlier attention: confirm carry-on and cabin policies with the airline directly once you have flight dates, not after tickets are purchased. Most carriers and venues expect a deposit to hold dates, so budget for that paperwork early rather than scrambling the month before departure.
Packing essentials round out your pre-trip checklist:
- Hardside cases for anything fragile or irregularly shaped.
- Spare mallets, strings, reeds, and valve oil packed separately from the main case.
- Black towels or moving blankets to protect trap stands and hardware corners.
- Instrument-specific padding for anything with exposed keys, bells, or finishes.
Before wheels roll, take photos of every case’s condition, print a backup copy of the inventory, and confirm what your travel protection or carrier insurance actually covers for instrument damage or loss.
Assign roles, documentation, and on-site run sheets
One person should own equipment logistics for the entire trip. That equipment lead confirms the master inventory, signs off on loading, and is the single point of contact if something goes missing. Deputies, usually section leaders or chaperones, handle their own instrument group but report back to the lead at every checkpoint.
Write a load and unload checklist that pairs with a stage setup diagram, so anyone helping on travel day knows exactly where each case goes and who is responsible for it. For school-owned or borrowed instruments, a short loan agreement and condition report protects both the school and the student, and gives you a paper trail if a dispute comes up after the trip.
- Equipment lead confirms the inventory matches what’s loaded, case by case.
- Deputies check their section’s gear at every stop: departure, venue arrival, and return.
- A printed checklist travels with the group even when the inventory lives digitally.
Pro Tip: Keep an electronic inventory synced to a shared drive, but also print a paper checklist for loading and departure. Phones die and signal drops; paper doesn’t.
Transport modes and regulatory screening: air travel, charter buses, and local carriers
Each mode of transport carries its own rules, and organizers who check them in advance avoid the worst surprises.
For air travel, the U.S. Department of Transportation (opens in a new tab) requires airlines to publish their instrument policies, and an instrument that exceeds an airline’s size or weight limits may have to be checked rather than carried on. Contact the airline directly about cabin limits before booking, consider purchasing an adjoining seat for a large instrument like a cello, and choose nonstop or direct flights when possible to cut down the risk of an instrument getting misrouted during a connection.
Nonstop routing lowers risk: choosing a nonstop or direct flight reduces the chance an instrument is mishandled or delayed during a plane change, which matters most for irreplaceable or school-owned pieces.
At the checkpoint, the Transportation Security Administration (opens in a new tab) screens every musical instrument, whether it’s carried on or checked. Tell the screening officer ahead of time if an instrument needs special handling, and pack every case as though it might end up checked, since the final call on carriage rests with airline staff and gate agents. Mark cases “Fragile” and include contact information both inside and outside the case.
For charter buses and local vans, reserve dedicated under-bus storage when you book, not as an add-on later. Measure door and compartment clearances against your largest cases, especially tubas, bass drums, and hardware trunks, and confirm loading procedures with the driver or crew in writing.
- Confirm cabin and checked-baggage size limits with the airline in writing.
- Inform TSA officers of fragile or special-care instruments before screening begins.
- Reserve bus storage space with exact dimensions included in the booking confirmation.
Operational tip: book transport as early as your itinerary allows, and get written confirmation of case space, including size and weight specs, rather than a verbal assurance.
Packing, labeling, loading, staging, and venue coordination best practices
Case selection determines how much protection your gear has before anyone even touches a vehicle. Hardside cases with suspension cushioning keep instruments away from outer shell impacts, and loose accessories need their own padded compartments so they don’t rattle against the instrument body. Temperature-sensitive stringed instruments travel better with strings loosened slightly to reduce tension stress during long rides.
A consistent labeling system prevents mix-ups at every stop:
- Case ID number matching the master inventory.
- Ensemble section (brass, percussion, color guard) marked clearly.
- Student name and a phone number both inside and outside the case.
- A color-coded or numbered tag indicating load order for faster unloading.
Venue coordination closes the loop before the trip even begins. NAfME advises getting detailed information from the venue about which instruments and equipment it provides, since differences in models and accessories can affect student performance even when the basic instrument is technically available. Confirm exact models in advance, and bring familiar mallets or accessories rather than relying on whatever is sitting at the venue. A spare drumstick bag with a few backup pairs and a drum key, a setup Temple of Sound (opens in a new tab) recommends keeping on hand, solves a surprising number of last-minute percussion problems.
Pro Tip: Run a dry rehearsal of the load and stage-movement sequence before the actual performance day, and assign an adult monitor to each transition point, loading dock, backstage door, and stage wing.
International tour essentials: ATA Carnet and customs documentation
When a performance tour crosses international borders with instruments or AV gear, an ATA Carnet can simplify temporary importation and re-entry. U.S. Customs and Border Protection (opens in a new tab) notes that a carnet is valid for one year and can permit multiple re-entries across participating countries, but acceptance and serial-number inventory requirements vary by destination, so this needs checking well before departure rather than at the airport.
- Prepare a serial-numbered equipment list with declared values for every item crossing the border.
- Start the carnet application early: issuance and country-acceptance checks take real lead time.
- Keep insurance and a bonded alternative ready in case a destination doesn’t accept the carnet.
CBP’s carnet guidance makes clear that customs planning belongs in the earliest stage of international logistics, alongside flight and venue bookings, not as a last-minute document chase.
Contingency planning: backups, spares, and post-performance verification
Equipment failure or loss during a tour is manageable when you’ve planned for it ahead of time. Assign backup instruments or accessories for anything that’s hard to replace on short notice: a spare reed supply for woodwinds, an extra snare head, a backup cable kit for electronics. These spares travel with the equipment lead rather than being scattered among individual students, so there’s one place to look when something breaks.
Post-performance verification closes the loop on every leg of the trip. Before the group leaves a venue, the equipment lead and deputies should run the master inventory checklist again, case by case, confirming everything that arrived is also leaving. This catches instruments left in a warm-up room or accessories forgotten backstage before the bus pulls away rather than three states later.
Build a short contingency plan into your run sheet: who contacts a local rental shop if an instrument is damaged beyond use, who has the insurance paperwork on hand, and who makes the call if a piece of equipment needs to be replaced mid-tour. Having these answers decided in advance, rather than improvised under pressure, is what separates a minor hiccup from a trip-ending problem.
Vehicle type and size selection guidance based on equipment volume and fragility
Vehicle choice should follow your inventory, not the other way around. Count your cases, measure the largest pieces, and match that against the storage capacity of whatever you’re booking, rather than assuming a standard motorcoach has enough room for a full percussion section plus luggage.
Large ensembles with tubas, marimbas, timpani, or color guard equipment typically need a dedicated equipment truck or trailer separate from the passenger vehicle, since underbus storage on a standard coach fills quickly once personal luggage is added. Smaller ensembles traveling with woodwinds, brass, and string instruments can often manage with coach storage alone, provided cases are measured against door and compartment dimensions beforehand.
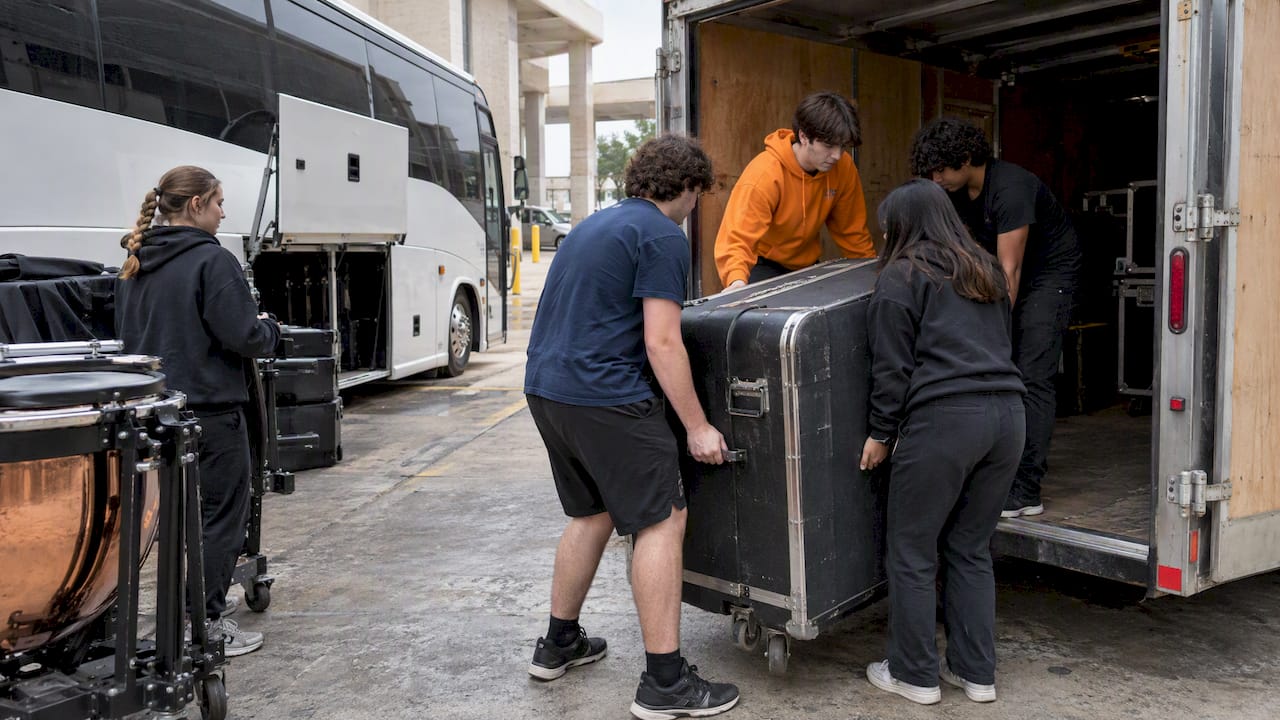
Fragility affects vehicle choice as much as volume does. A climate-controlled cargo area protects sensitive instruments better than an open trailer exposed to temperature swings, and a vehicle with a smoother ride or air suspension reduces vibration damage on long highway stretches. When in doubt, oversize your vehicle request rather than packing cases in tight, since compressed storage increases the chance of shifting and impact damage during transit.
Detailed loading and securing methods inside transport vehicles to prevent damage
Loading order matters as much as the vehicle itself. Load heaviest and sturdiest cases first, along the floor and against solid walls, with lighter and more fragile pieces secured on top or in padded sections, never the reverse.
Every case should be strapped or braced so it can’t shift during transit. Cargo straps across rows of cases, foam blocking between irregular shapes, and non-slip mats under anything that could slide all reduce in-transit movement. Loose items inside a cargo hold are the most common cause of instrument damage on a performance tour, since a single sliding case can crack a neighboring one during a hard stop.
Leave accessible space near the door for anything needed quickly at a venue, so the crew isn’t unloading half the truck to reach one trumpet case. A loading diagram, matched to your run sheet, tells the crew exactly where each case belongs and in what order, which keeps the process consistent whether the same driver handles every leg or a new crew loads the vehicle at each stop.
Special considerations for temperature or humidity-sensitive instruments or gear
Wood, brass, and string instruments all react to temperature and humidity swings, and a performance tour often moves through several climate zones in a single day. Never leave an instrument case in a hot vehicle trunk or an unheated cargo hold for extended periods, since rapid temperature shifts can crack wood, warp pads, or loosen glue joints on string instruments.
Allow instruments time to acclimate once they reach a new environment rather than opening a case immediately after a cold or hot ride. A half hour of adjustment time before a case is opened lets the instrument settle to room temperature gradually, which reduces the stress on seams, finishes, and tuning.
For AV and electronic equipment, humidity poses its own risk: condensation inside a case moved quickly from an air-conditioned bus into humid outdoor air can damage circuitry. Silica gel packets inside cases, and a few extra minutes before powering on equipment that just came off a vehicle, prevent most of this damage. Building these buffer periods into your run sheet, rather than rushing straight from vehicle to stage, protects the gear without adding meaningful time to your schedule.
Communication protocols among transport team during transit and at venues
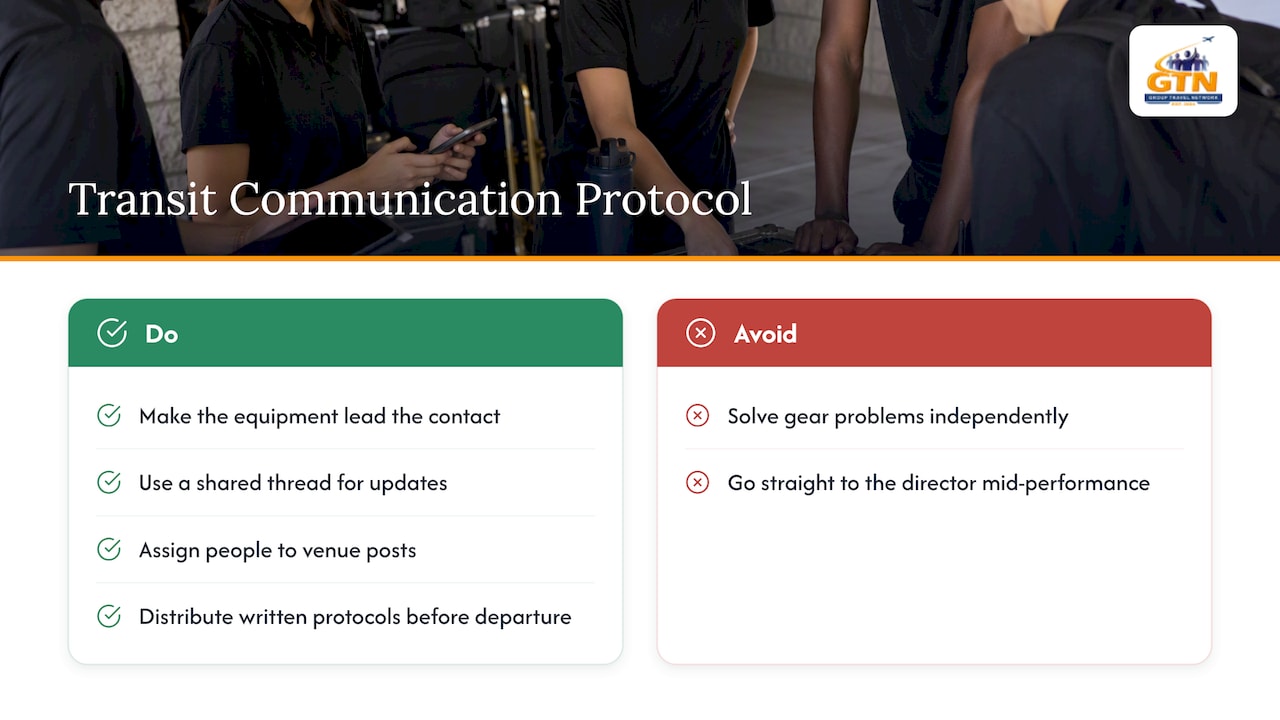
A performance tour moves fastest when everyone knows who to contact and how. Set a simple protocol before departure: the equipment lead is the single point of contact for anything gear-related, and deputies report issues to that person rather than solving problems independently or going straight to a director mid-performance.
Group messaging apps or a shared text thread work well for real-time updates between the equipment lead, bus drivers, and venue contacts, especially for time-sensitive changes like a delayed arrival or a last-minute loading dock switch. At the venue itself, assign specific people to specific posts: one adult at the loading dock, one at the stage door, one backstage, each with a radio or phone and a clear sense of what to watch for.
NAfME’s guidance on festival planning treats movement between warm-up and performance areas as a designed process with assigned people and clear communication, and that same structure applies directly to touring: a practical run sheet should show who loads each case, where it goes, who holds keys or access credentials, and how much time each phase, setup, soundcheck, performance, and teardown, actually takes. Written communication protocols, distributed before the trip rather than explained on the fly, keep the whole team working from the same plan.
Donovan’s practical take from organizing school performance trips
A written run sheet paired with a clearly named equipment lead has prevented more lost cases than any single packing trick we’ve used. On one tour, confirming the venue’s exact percussion models ahead of time caught a mismatch that would have forced a section to perform on unfamiliar equipment with no rehearsal time to adjust.
The lesson holds across every trip: equipment transport fails less often from bad luck than from skipped confirmation calls and missing checklists. Systems beat improvisation every time a schedule gets tight.
— Donovan
Group Travel Network: how we support equipment transport on performance tours
The Performance Tours (opens in a new tab) service was built around the logistics problem this guide walks through: coordinating instruments, stage gear, and schedules so your staff can focus on students instead of vendor calls. Dedicated trip coordinators confirm vendor bookings, negotiate transport contracts, and help build the run-sheet timeline alongside your equipment lead.

The work splits as follows: vendor confirmations, carrier paperwork, and schedule coordination are managed, while your team keeps ownership of student supervision and instrument assignment, since your directors and section leaders know the ensemble’s gear best.
- Trip coordinators manage vendor and transport confirmations.
- Payment plans help spread deposits and balances across the planning timeline.
- Travel protection options are included in itineraries from the start.
If you’re planning a tour and want transport logistics handled by people who do this every season, reach out through our Performance Tours page to start a conversation about your dates and destination.
FAQ
How far in advance should we book transport for a performance tour?
Reserve charter coaches and confirm airline reservations as soon as your itinerary and travel dates are locked in, ideally two to three months ahead for ground transport. Most carriers require a deposit to hold dates, so early paperwork avoids losing your preferred vehicle or flight slots.
Do musical instruments need to go through TSA screening?
Yes, every musical instrument is screened whether it’s carried on or checked, according to the Transportation Security Administration. Tell the screening officer in advance if an instrument needs special handling, and pack it as though it might end up checked.
What is an ATA Carnet and when do we need one?
An ATA Carnet is a customs document that simplifies temporary importation of equipment like instruments and AV gear for international tours, and U.S. Customs and Border Protection notes it’s valid for one year with multiple re-entries in participating countries. Check destination-country acceptance and serial-number requirements well before departure, since processing takes real lead time.
Should we confirm what instruments the venue provides before a performance?
Yes, confirming exact models and accessories the venue provides is essential, since NAfME notes that differences in equipment can affect student performance even when a basic instrument is technically available. Bring familiar mallets or accessories as backup rather than relying entirely on venue equipment.
Who should be responsible for equipment during a school trip?
A single named equipment lead should own the master inventory and sign off on loading and unloading at every stop, with deputies handling their own section’s gear. This structure, recommended by NAfME’s guidance on instrument inventory controls, keeps accountability clear and reduces the chance of lost or mismatched cases.
Sources
- Traveling With a Musical Instrument | US Department of Transportation (opens in a new tab)
- What steps are taken to screen musical instruments? | TSA (opens in a new tab)
- U.S. Customs and Border Protection (CBP) — ATA Carnet guidance (opens in a new tab)
- Prepare for next school year – NAfME (opens in a new tab)
Recommended
- Essential Performance Trip Checklist For Stress-Free School Travel (opens in a new tab)
- School Group Travel Planning: A Step-by-step Guide (opens in a new tab)
- Step By Step School Trip Guide For Stress-free Travel (opens in a new tab)
- Student Performance Travel: Unlock Your Students’ Potential (opens in a new tab)